Week 17
Last Week I had done the feet, this Week I move onto the las body part needed for the model, which are the hands. Yet again I looked at the Youtuber 2AM for how he made the hands, because the model will be consistent if I follow the exact same guide all the way through.


Then I delete the faces where the first finger would go, then like the foot I make a circle which has 6 edges, I scale it down to be about the same size of a finger and then I extrude it upwards along the Z axis.

I then Loop cut Twice on the finger to get the joints, and then I make two more loop cuts on each joint one above both Joints and one below to make supporting edges.

I face off the top of the finger and make the top slopped instead of flat to make it look more like a finger, I then select the middle edge for both of the joints and scale them down to give the detail of the joint, lastly I shade smooth the hand and add a turbo smooth modifier. Note sometimes the faces for the finger can be facing the wrong way, so like the face we press A to select the whole object and then press Shift + N to recalculate the faces direction.

Then in sculpt mode I make the bottom of the finger wider and the top of the finger more narrow

I Then duplicate the fingers and scaled them up or down, depending on which finger it was, and moved them into place ready for attaching to the hand

Then like the foot I connected it to the rest of the hand by using the bridge loop edges. I did this for all the fingers, then I moved the ring finger closer to the middle finger as these fingers tend to be closer while the other two are further apart, I also moved part of the hand out so it looked less weird, however I will be going back to it, so its not finished yet.


Like the foot we will start by making a box and loop cutting (Ctrl + R) it, but this time we will loop cut it 3 times along the Z and Y Axis, and once along the X axis.

Then I scale the box down along the Y axis, I move the box up select the bottom faces and extrude them down along the Z axis to get the wrist of the hand.

Then I delete the faces where the first finger would go, then like the foot I make a circle which has 6 edges, I scale it down to be about the same size of a finger and then I extrude it upwards along the Z axis.

I then Loop cut Twice on the finger to get the joints, and then I make two more loop cuts on each joint one above both Joints and one below to make supporting edges.

I face off the top of the finger and make the top slopped instead of flat to make it look more like a finger, I then select the middle edge for both of the joints and scale them down to give the detail of the joint, lastly I shade smooth the hand and add a turbo smooth modifier. Note sometimes the faces for the finger can be facing the wrong way, so like the face we press A to select the whole object and then press Shift + N to recalculate the faces direction.


I Then duplicate the fingers and scaled them up or down, depending on which finger it was, and moved them into place ready for attaching to the hand

Then like the foot I connected it to the rest of the hand by using the bridge loop edges. I did this for all the fingers, then I moved the ring finger closer to the middle finger as these fingers tend to be closer while the other two are further apart, I also moved part of the hand out so it looked less weird, however I will be going back to it, so its not finished yet.

With making the thumb I delete one vert near the bottom of the hand, and then make an eight edged circle this time, then I follow the same method on how to make the fingers, except for the thumb we will be making one joint instead of two, we also recalculate which way the faces are facing, and we use the sculpt tool to make the thumb thicker.

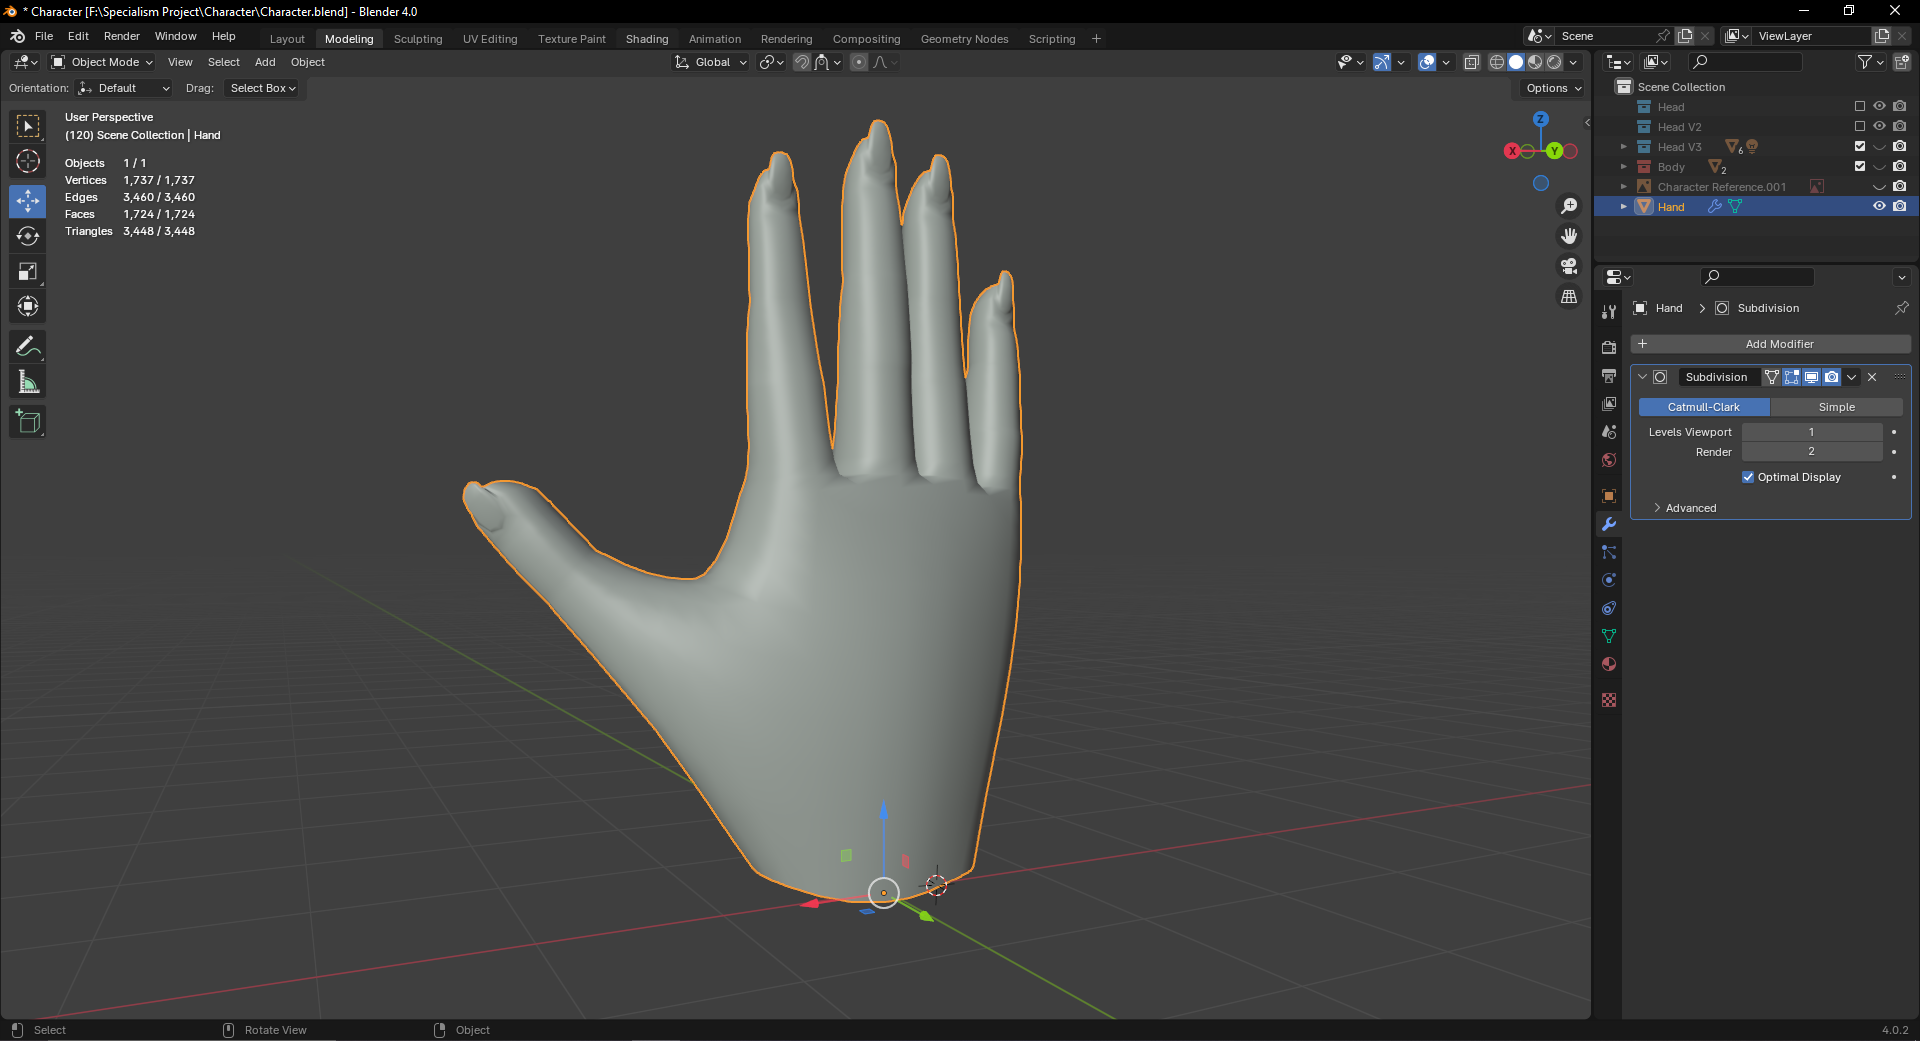
Then to finish the hand I attach the thumb to the rest of the model, I make a loop cut around the connection because the faces would be stretched out to far so we give it a supporting loop so that the topology is smoother and the end product looks better.

Then I added in the nails because I wanted to make sure the fingers were done before I did the nails. I also thickened up the hand and the fingers so that everything wasn't flat, I shrunk the fingers down as well because I thought that they looked too long and the thumb I made a lot smaller because when I shrank the fingers the thumb looked out of place so I had to shrink it down a bit.

The last thing I have to do is connect the hand to the rest of the body.

Reference
35 - Make hands *easy* in blender! fast, efficient & consistent way (2023) YouTube. Available at: https://www.youtube.com/watch?v=3CTSpfS_gCo (Accessed: 22 February 2024).


Getting there, use your anatomy research to improve the realism of the hands. Add tendons, knuckles etc!
ReplyDelete